How it works
Open it. Mark three sides. Fold it flat.
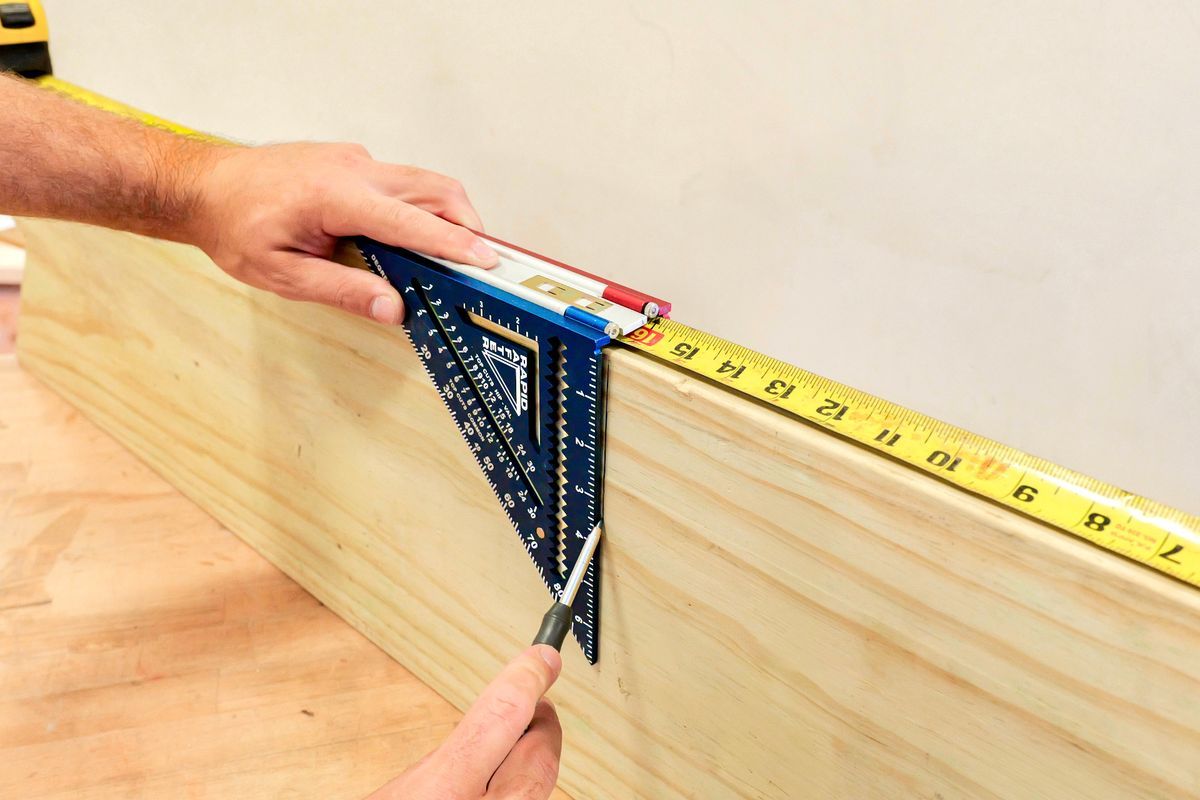
The only square that, in the open position, marks three sides of any 2× material in a single motion.
- 1
Open the square
Unfold it into the open position — like dropping your truck into 4×4.
- 2
Straddle the stock
Set it over any 1½″–2″ material. Both fences register against the board.
- 3
Mark three sides at once
One pass marks both faces and the top edge — a perfect perpendicular line, regardless of board quality.
- 4
Fold it flat
Closed, it works exactly like the everyday square already in your apron.
The difference
Rapid Rafter vs. a traditional square
| Job-site task | Rapid Rafter | Traditional square |
|---|---|---|
| Squaring a 2× cross-cut | Marks both faces and the top edge in one motion | Mark one face, flip the square or board, mark again |
| Rough boards or boards with wane | Perfect perpendicular line regardless of board quality | Line can wander on uneven edges |
| Everyday carry | Folds flat — works as your normal square | Standard everyday square |
| Design | Patented dual-sided — U.S. 11,654,545 B1 | Single-sided |